Anleitung zum Einrichten eines Proxys in Browsern / Software / Erweiterungen
HOW TO CONFIGURE A PROXY: THE MOST SUITABLE PROGRAMS
10.08.2020
What it takes to get started
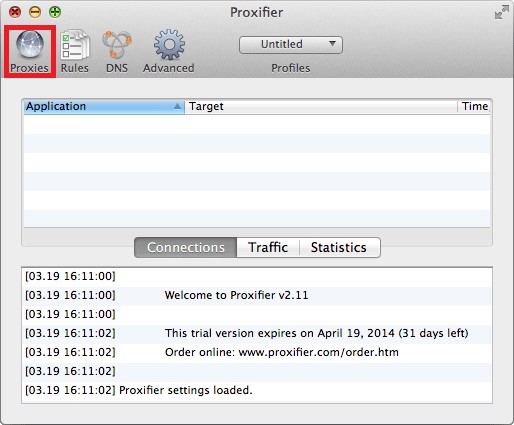
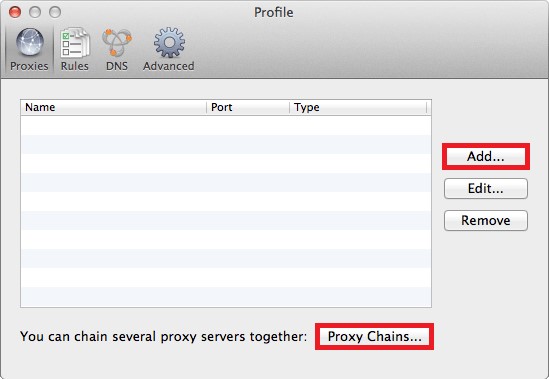
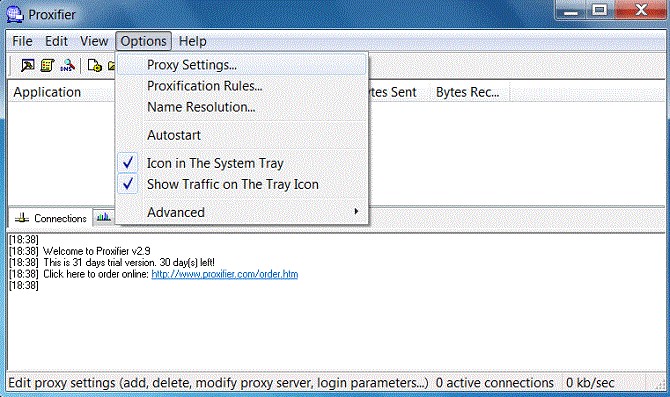
First and foremost, the proxy server itself. There are free hosts (and for regular use, viewing websites and videos and other simple tasks). For more complex tasks (for example, online gaming applications), you need well-secured social network accounts to eliminate the possibility of blocking and theft of payment card data. An individual proxy server will be best. You will need an IP host and port number, and for a private server you will need an account with a password. And additional software to check the proxy server is not necessary, as the applications in demand are themselves configured to work with similar hosts. Proxifier For 30 days you can use the program for free. You can download it from the official site. Allows to work with all applications that do not support proxy connection (Proxifier is supported by the software developed for FTP, popular web browsers, messengers, Kazaa, Skype, IRC clients). Moreover, it is compatible with Webmoney, and system administrators respond positively to SSH protocol and Telnet. Thanks to it, you can browse through videos, listen to audio recordings, etc. There are versions for Windows and for macOS. The best option is Portable Edition (you only need to download the program, it does not need to be installed). And checking the validity of a proxy is not required. Regarding shortcomings It is said that IPv6 protocol is supported (whether it is so is unknown). SOCKS5 protocol does not work properly in all cases. The configuration of the program for Windows and macOS is very simple. Instructions At the top left, click on Proxy Server (the same as selecting it in Profiles). Those who have Macintosh, select Proxies.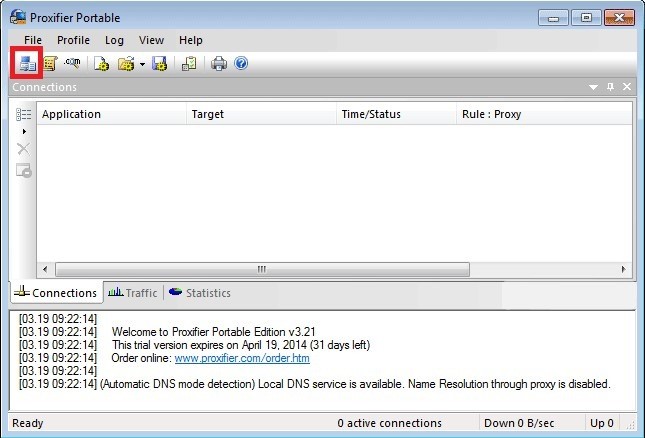
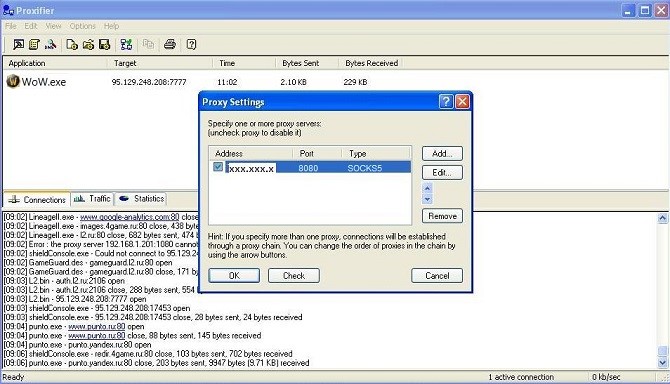
 The form appears, click Add … (add the proxy address)
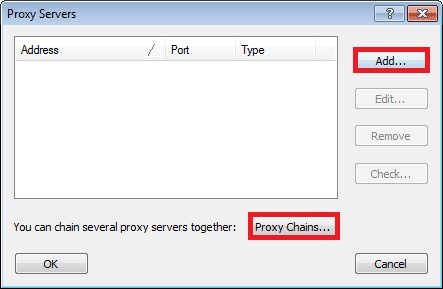
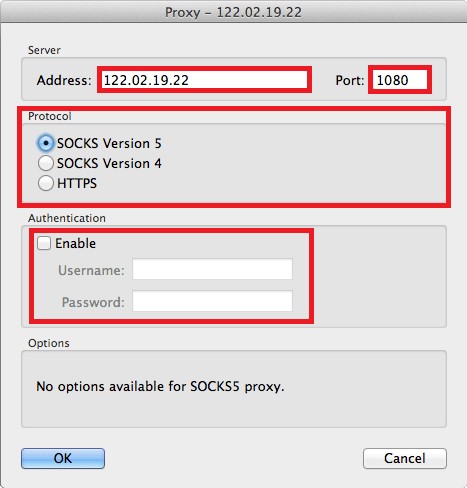
 And then the setup is pretty simple. You need to fill in the fields that appear (address, port, protocol, account, password).
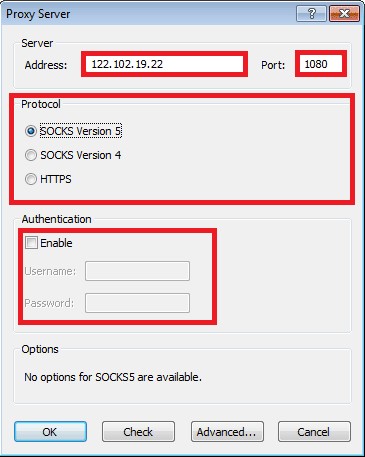
 Click Check below to test the proxy server.
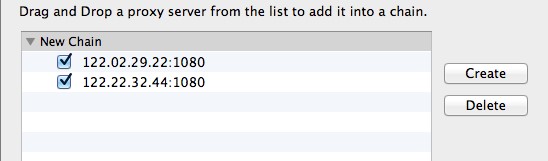
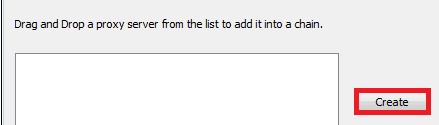
The program allows you to create a chain of proxy servers (of course, they should be purchased ahead of time). Similarly, they will be added to the list.
Next, click Proxy chains, click Create. Using the mouse, drag the proxy lines into the window below, creating a new chain.
Click Check below to test the proxy server.
The program allows you to create a chain of proxy servers (of course, they should be purchased ahead of time). Similarly, they will be added to the list.
Next, click Proxy chains, click Create. Using the mouse, drag the proxy lines into the window below, creating a new chain.
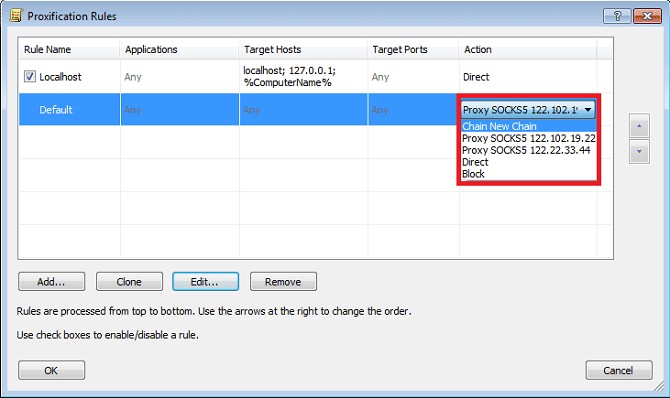
 Go to the Profiles menu, select Proxification Rules, find the desired proxy (or chain) for the future connection. By the way, here it is possible to configure the application to your taste.
By default, the rule is set as default. It cannot be changed. If there are no other rules, the connection is generally made through a default proxy server.
Go to the Profiles menu, select Proxification Rules, find the desired proxy (or chain) for the future connection. By the way, here it is possible to configure the application to your taste.
By default, the rule is set as default. It cannot be changed. If there are no other rules, the connection is generally made through a default proxy server.

 Each profile has a default rule (localhost). If this rule is active, the local tunnel connection on the PC is not guaranteed by the application.
Note that such connections can be significant for Firefox and similar connections.
This rule can be either changed or deleted, but you need to do this only if you are sure that you need a proxy to connect to the local PC. The rules in Proxifier are applied from top to bottom, so it is important how they are ordered (you can change the order of the rules in the list with the arrows on the right).
To enable or disable a rule, use checkboxes. You can also change actions. To add the condition press Add …, copy (Clone button), edit with Edit … the Remove button (or Del on the keyboard) is deleted.
When you perform actions to add or change conditions, a form with the following fields is displayed:
Each profile has a default rule (localhost). If this rule is active, the local tunnel connection on the PC is not guaranteed by the application.
Note that such connections can be significant for Firefox and similar connections.
This rule can be either changed or deleted, but you need to do this only if you are sure that you need a proxy to connect to the local PC. The rules in Proxifier are applied from top to bottom, so it is important how they are ordered (you can change the order of the rules in the list with the arrows on the right).
To enable or disable a rule, use checkboxes. You can also change actions. To add the condition press Add …, copy (Clone button), edit with Edit … the Remove button (or Del on the keyboard) is deleted.
When you perform actions to add or change conditions, a form with the following fields is displayed:
- Name (name of the condition, filled in arbitrarily);
- Enabled (indicates whether the rule is enabled or disabled);
- Applications (list of applications to work with the rule, separating them with „;“);
- Browse (helps to find the file, which will be added to the list).
- Target hosts (DNS hosts are specified here).
 We enter the host (address) and port number.
In the Protocol section on the desired item mark the radio button. If you need authorization, you must enable Use authentication, enter the name (Username) and password (Password).
We enter the host (address) and port number.
In the Protocol section on the desired item mark the radio button. If you need authorization, you must enable Use authentication, enter the name (Username) and password (Password).
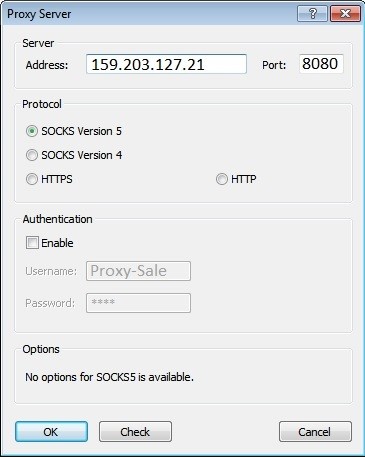 Next, check the validity of the proxy (line in Proxy Settings). If Testing failed is terminated, the test has failed (usually the type of proxy is specified incorrectly).
When purchasing a proxy from us, the buyer will receive all the necessary data as well as consultations about the configuration of the server.
Next, check the validity of the proxy (line in Proxy Settings). If Testing failed is terminated, the test has failed (usually the type of proxy is specified incorrectly).
When purchasing a proxy from us, the buyer will receive all the necessary data as well as consultations about the configuration of the server.
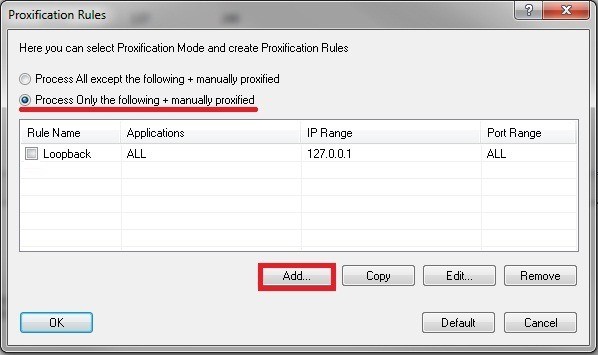
 If the test is successful, the form will be closed. Then go to Proxificatin Rules from the Options menu.
The radio button changes to Process Only the following + manually proxified, then click Add….
If the test is successful, the form will be closed. Then go to Proxificatin Rules from the Options menu.
The radio button changes to Process Only the following + manually proxified, then click Add….
 Enter the name of the rule (any), click the Browse button in the Applications section.
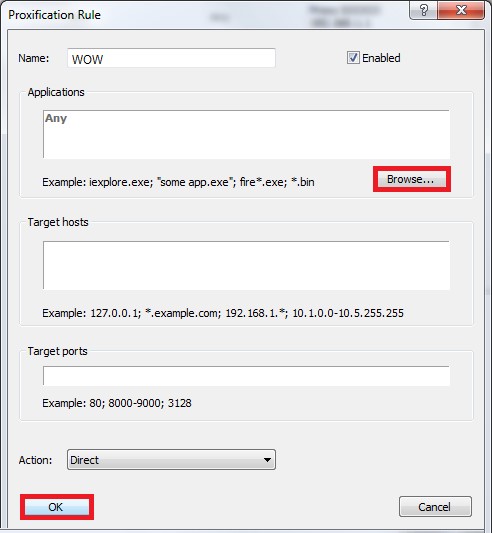 In the folder with the game select the executable file (name).exe.
Confirm and close all windows. All, you can start the game.
In the folder with the game select the executable file (name).exe.
Confirm and close all windows. All, you can start the game.
ProxyCap
Downloaded from the official site. The advantage of the program is that it checks the validity of the proxy server (you only need to download the program itself). Allows you to run all programs, including non-proxy support. Suitable for SOCKS4, HTTPS, SOCKS5 protocols. Trial period – 30 days (after the program expires, you need to buy). A plus is the ability to specify for applications whether they work with a proxy or not. The configuration is similar to Proxifier. Find the settings, click New prosy server in the upper left corner.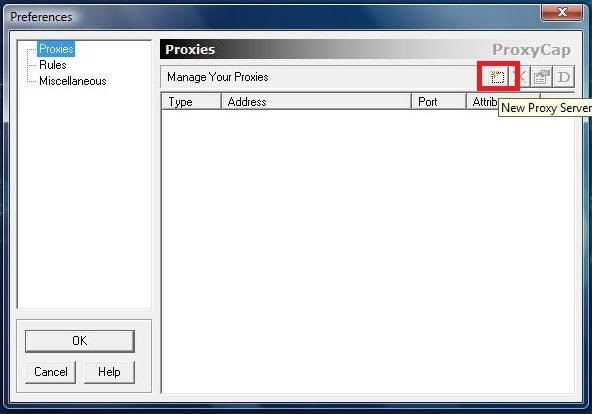 In the Server field you need to fill in the fields: IP address, port number, authorization data (the latter – if needed).
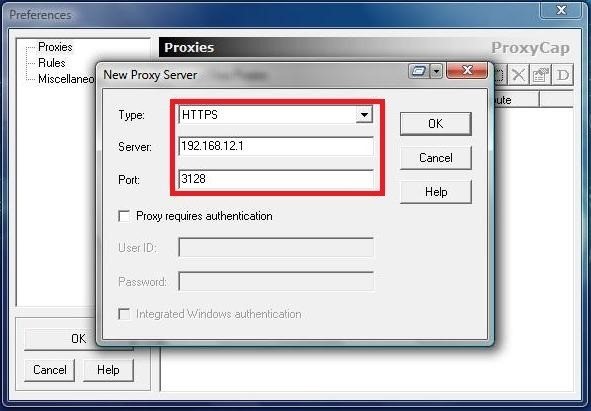 Click OK (to save the changes).
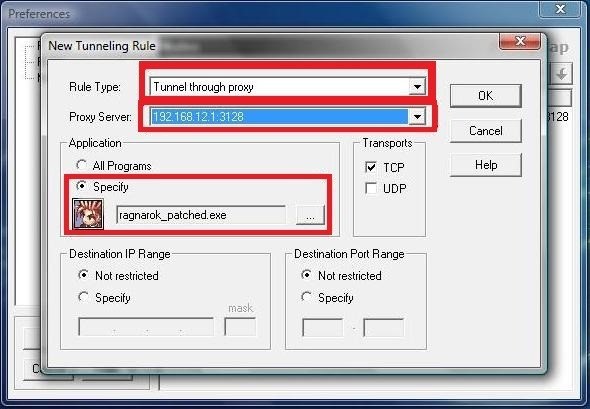
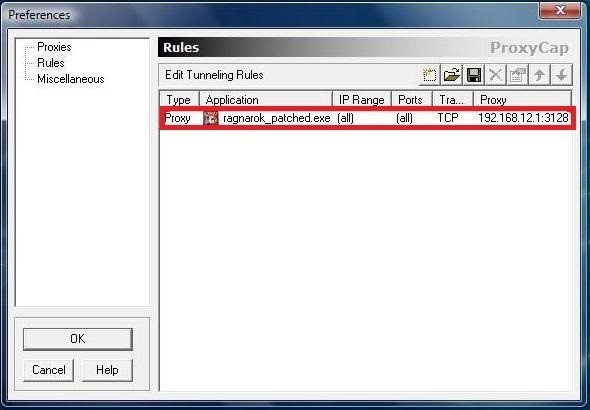 To check the validity of the server on the right side in the corner, click Check. A field will appear where we enter the Internet address (for selection) and then start the test. In case of a successful test, we go to the Rules section, there we form a rule to forward the traffic. If the proxy is required for all applications, the Tunnel through proxy value is selected in the Rule Type list and the Resolve names remotely checkbox is checked. You should also set the TCP and UDP check boxes. As a result, the passage of traffic through proxy (most programs for working with the server) will be provided.
Proxy Switcher
In many respects similar to ProxyCap. The program is free, but it is limited in functionality. Therefore, it is better to buy it. It differs in that it becomes possible to work with the proxy configuration, the proxies are automatically loaded, which are responsible for integrity testing and anonymity support. You can play all online games, personal data is protected to the maximum. There is an option to switch between servers at a given time. To customize the program, click + (red) on the toolbar. A window will appear to enter the proxy data.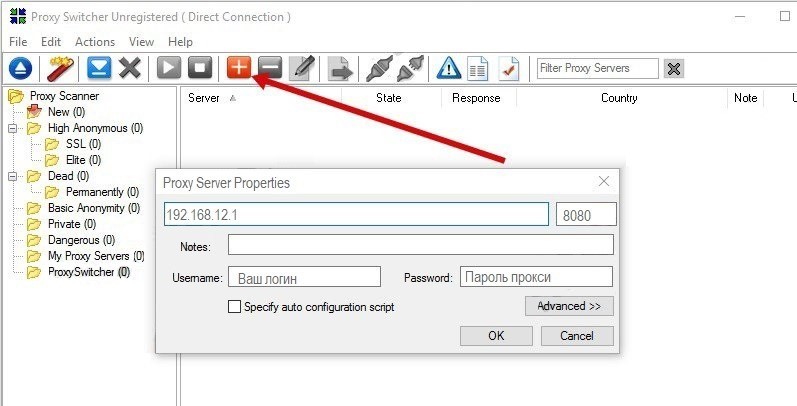 Click OK (to save the settings).
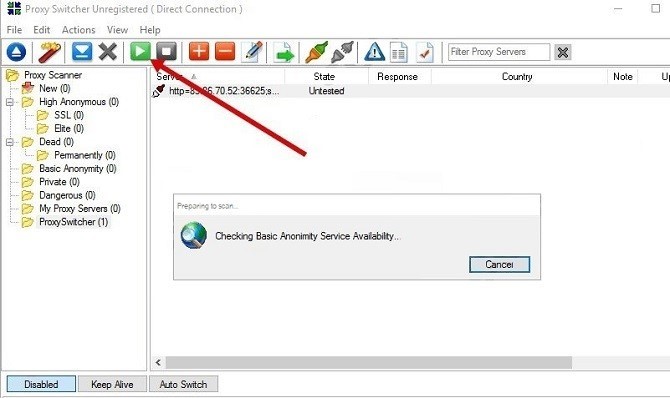 Go to the toolbar, select the green icon (in a white triangle), and start testing the connection you added.
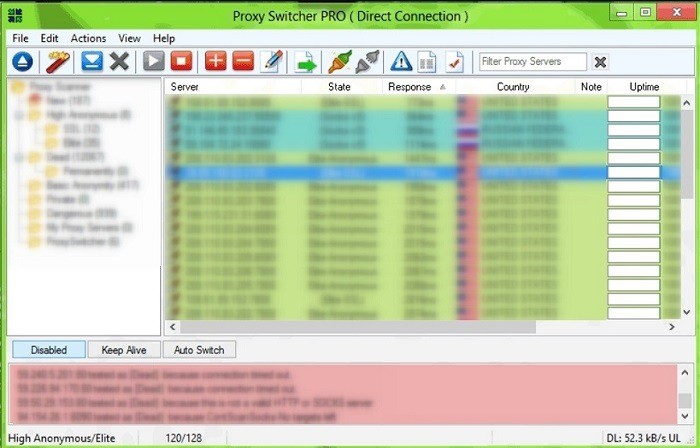 After the verification, the proxy is ready for use.
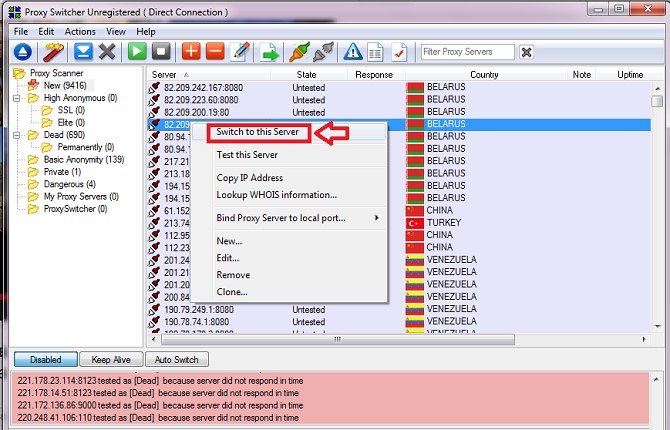 Right-click one of the added proxies and then select Switch to this Server. This is a method to switch between proxy servers.
Linux: Which programs work with proxy
The programs mentioned before are for Windows. What about Linux? It turns out, and for this operating system there is a large number of programs. But almost everyone does not have a graphical shell, the configuration process is done through the command line.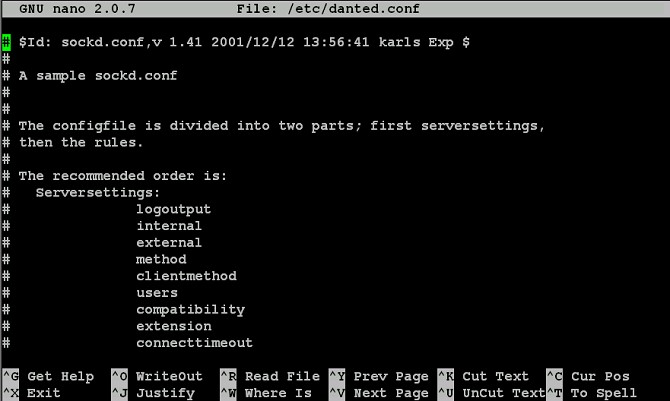
Browser extensions
It seems that this is not particularly relevant, since most web browsers support proxy configuration. True, not all of them do. For example, the same Chrome (Google) does not provide this process. Other internet browsers don’t support all settings either. What to do. Quit in extensions that complement proxy browsers. The most popular -FoxyProxy and Proxy for Chrome. Connect without any problems. To install the first of them, you need to go to the official resource, find the line „Add Forefox“ and click on it. Installation begins, then restart the browser and prescribe proxy server if necessary. How to perform the operation, you can learn from the article that describes how to configure FoxyProxy for Forefox. In Mozilla and other web browsers the settings for working with the proxy server are made in the same way.
Das könnte Sie interessieren


Partnerprogramm
UNSER PARTNERPROGRAMM ermöglicht es Ihnen, 10% ALLER ZAHLUNGEN IHRER KUNDEN ZU ERHALTEN.
Für eine Rolle im Programm benötigen Sie nur:
Locken Sie neue Kunden zu uns per Empfehlungslink – der durch Ihren Link registrierte User wird immer für Sie gestärkt und alle seine Zahlungen an Sie werden um 10% angepasst.
Die Partnerprämie kann auf WebMoney,
  Yoomoney,
  Attache USDT (TRC20),
  abgehoben werden, oder auf die Zahlung für jedes Angebot unseres Dienstes angewendet werden.
Locken Sie neue Kunden zu uns per Empfehlungslink – der durch Ihren Link registrierte User wird immer für Sie gestärkt und alle seine Zahlungen an Sie werden um 10% angepasst.
Die Partnerprämie kann auf

Haben Sie Fragen oder sind Sie ein Großhändler?
Senden Sie uns eine ![]() Telegram, und wir werden versuchen, Ihnen so schnell wie möglich zu helfen und Sie zu beraten.
Telegram, und wir werden versuchen, Ihnen so schnell wie möglich zu helfen und Sie zu beraten.
Boni und Service-Updates sind immer auf unserem Telegram-Kanal verfügbar.
Abonnieren Sie den Kanal, damit der Adel über alle Neuigkeiten informiert ist.


Спасибо!
Ваша заявка принята!
В ближайшее время
мы свяжемся с Вами
Ваша заявка принята!
В ближайшее время
мы свяжемся с Вами
