Anleitung zum Einrichten eines Proxys in Browsern / Software / Erweiterungen
INSTRUCTION: EASY PROXY SERVER SETUP ON WINDOWS 7 IN 30 SECONDS
27.12.2018

- Work with multiple social media accounts.
- Parsing search queries from search engines.
- Bypassing website blocking at the regional, workplace, or school level.
- Protecting personal data from scammers and hackers.
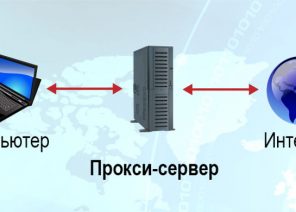
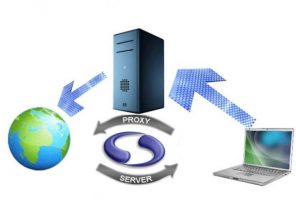
Configure a proxy on Windows 7
You can configure a proxy for Windows 7 both in the operating system itself and with special software. The first method takes much less time and requires the following tasks step by step:- From the Start menu, go to the Control Panel.
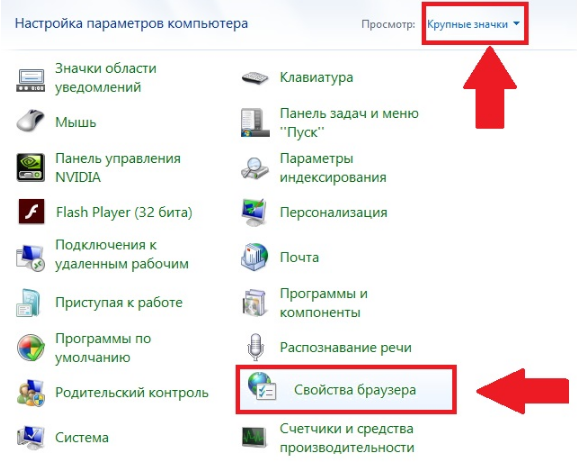
- Select the „Browser Options“ section – depending on the version, it may also be called „Internet Options“.
- In the window that appears, click the Connections tab and look for Network Settings.

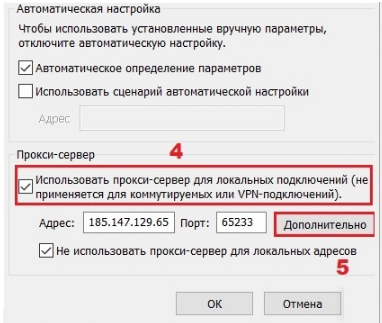
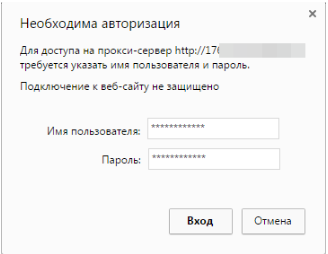
- Allow the use of a proxy server for local connections. Do not forget to write its address and port in the correct lines.
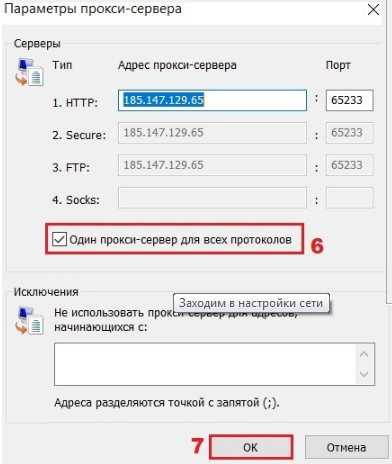
- Click the Advanced button and enable the One proxy for all protocols feature.
- If you have addresses that do not require a proxy server, enter them by semicolon in the corresponding field. Then you can easily make the necessary changes, add or remove IP addresses, add to the list of exceptions.
Disabling Proxy in Windows 7
The need to disable the proxy server often occurs among the owners of public addresses, as such IPIS are characterized by regular failures and connection problems, and in case of a weak signal of the Internet they cannot be turned on at all. You can disable Proxy on Windows 7 in a few minutes:- On the Connections tab, look for the VPN string and dial-up connections.
- Specify the type of connection you want to use later.
- Click Settings.
- In the window that appears, disable the use of Proxy for this connection..
Das könnte Sie interessieren


Partnerprogramm
UNSER PARTNERPROGRAMM ermöglicht es Ihnen, 10% ALLER ZAHLUNGEN IHRER KUNDEN ZU ERHALTEN.
Für eine Rolle im Programm benötigen Sie nur:
Locken Sie neue Kunden zu uns per Empfehlungslink – der durch Ihren Link registrierte User wird immer für Sie gestärkt und alle seine Zahlungen an Sie werden um 10% angepasst.
Die Partnerprämie kann auf WebMoney,
  Yoomoney,
  Attache USDT (TRC20),
  abgehoben werden, oder auf die Zahlung für jedes Angebot unseres Dienstes angewendet werden.
Locken Sie neue Kunden zu uns per Empfehlungslink – der durch Ihren Link registrierte User wird immer für Sie gestärkt und alle seine Zahlungen an Sie werden um 10% angepasst.
Die Partnerprämie kann auf

Haben Sie Fragen oder sind Sie ein Großhändler?
Senden Sie uns eine ![]() Telegram, und wir werden versuchen, Ihnen so schnell wie möglich zu helfen und Sie zu beraten.
Telegram, und wir werden versuchen, Ihnen so schnell wie möglich zu helfen und Sie zu beraten.
Boni und Service-Updates sind immer auf unserem Telegram-Kanal verfügbar.
Abonnieren Sie den Kanal, damit der Adel über alle Neuigkeiten informiert ist.


Спасибо!
Ваша заявка принята!
В ближайшее время
мы свяжемся с Вами
Ваша заявка принята!
В ближайшее время
мы свяжемся с Вами
